
This post started out as an outfit post. Not gonna lie. I'm so dorky and awkward sometimes that I thought it would be funny to do a "what I wear to change my oil" post. Then a liiightbuuulb (think Despicable Me) went off! Why not do a tutorial!?!
Loads of gals change their own oil. I'm not sure where I learned, I think it was the years growing up watching my uncles work on cars in their driveways. They were always filthy! I thought I'd show everyone how a girl gets it done! Here we go!
1. You need a car. Preferably one that needs an oil change.... like mine! Make sure the engine is cool. You should be able to touch the engine block and not get burned. This is very important! Meet Optimus Kiwi:

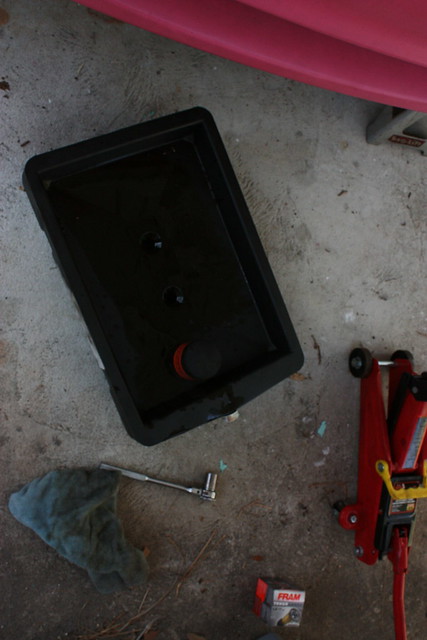
2. Get your supplies. It helps to get them all at once so the job goes smoothly.

1.) rags 2.) oil 3.) screwdriver, socket wrench, various sized sockets 4.)flashlight 5.) oil filter 6.) Jack 7.) Jack stands 8.) Drip pan and funnel (not pictured: water, have something to drink)
I like to have different sized sockets close by because I can never remember what size I need! Also check whether you need metric or standard sizes. My car is a Kia, so it uses metric. You don't need the flashlight or the screwdriver,but they're good to have just in case.
3. Put a brick behind each of your back tires. Find a good spot to put your jack. My car has a little round thing where the jack goes, usually this spot is in the center. Now, start jacking the car up! Go slowly though. Once you've got it up high enough place your jack stands under the car. There are also spots for these too. You'll seem them

4. Now the fun part! Slowly lower the jack onto the jack stands and pull it out from under the car, out of your way. Shimmy under the car on your back and bring your wrench, sockets and drip pan with you. I just lay on the driveway but you can lay on an old yoga mat if you'd like. You shouldn't wear anything that you don't want to get messy.
Your going to be looking for your oil pan. You might want to look up on the internet or in your owner's/repair manual before hand to find yours. Mine looks like this:

It's the grey metal bit at the top. There's a bolt on the oil pan. Match up the socket you need and then attach it to the wrench. My bolt is on the back of the pan, facing the rear of the car.
Once you've done that, position your drip pan underneath and loosen the bolt! It shouldn't be too tight. Take the bolt out completely and let it drop into you drip pan.
Shimmy out from under the car and let the oil drain for a little. This can be a little messy. See? This is also why it is very important to only work on the car once it's cooled. The oil can burn you.

5. Next, remove the old oil filter. This is definetly a part you'll want to look up the location. Mine just happens to be in the tightest spot ever. They make wrenches to remove these, but a little elbow grease should suffice. Check and make sure your drip pan is underneath the oil filter too. The filter in my car is actually in line with my oil pan bolt, I don't have to move the drip pan.
Remember I said you don't need the screwdriver? Sometimes the oil filter it really hard to remove. Some body with muscles put it on too tight. This is where the screwdriver comes in handy. Stab the side of old oil filter with the screwdriver and use it as a handle/leverage to loosen the filter!
Once you get the oil filter off, put it in the drip pan to drain as well.
6. Once everything has drained, get out your new oil filter. Dip the seal into the old oil, like so:

Now, put the new filter on the car. Tighted it as hard as you can with your hand. This is a part on my car that is "hand tighten" only that way I can get it off next time!
7. Now it's time to put the bolt back in the oil pan. The blot should have a washer on it. The washer can be metal or plastic. If yours is plastic like mine, make sure it is still in good shape (not cracking or melting).

Put the bolt back in and tighten it with your socket wrench. This is another one you want to "hand tighten." Make sure it is tight enough that you can still get it back off, then tighten it a little more. It should take a little muscle to get this bolt off.
8. Phew! The hard part is over! With all your bolts tightened you're ready to put the new oil in. Get your funnel and pour! Easy does it though. Pour slowly.

9. Now your ready to pour your old oil into the empty container. Get you funnel and place it into the jug. Then, put the plugs back into your drip pan. Leave the one furthest from the pouring spout a little loose. It will keep the oil from "glugging" when you pour. This part is sometimes easier to do with a little help.

TaDa!!!! You're done! Put the hood of the car down gently and get the jack. Put the jack under the car and lift it just enough so that you can remove the jack stands. Then lower the car down very slowly. Wipe up your tools and take your old oil into an auto parts store to be recycled! Pour kitty litter onto any spots you spilled oil in the driveway.
Now, hit the showers!

If you take care of your car, it will take care of you!
Wow, that is an awesome tutorial! I'm so impressed by you! And I love your pink car!
ReplyDeleteif by some chance the "oil" you have drained from the car has a "red" tint,.....................go to the auto store in another car and buy some transmission fluid note it is "red in color" I have heard of people doing just that draining the wrong part of the engine/ transmission assembly, sometimes in the dark under a car they can be confused.
ReplyDeleteEd
I'm impressed - how did you learn all this?
ReplyDeleteI'm not really sure... I think it was a combination of instinct and common sense!
ReplyDelete